What’s Your Cleaning Personality?

Doll vacuuming in a dollhouse

There are many different kinds of cleaner among us and we all have different styles and approaches. For some cleaning is one of those jobs we just keep putting off and for others it’s practically a hobby.

Which of these matches your cleaning personality?


The Hide-It-And-Hope


Cat covered over by a rug
“Just put a rug over it ..!”


You bumped into a friend this morning, you got chatting, you were telling them about the new curtains you’d just bought and then ‘blammo!’ you only went and invited them over this afternoon. But… the house… oh!


The Hide-It-And-Hope always means to get round to tidying and cleaning and making the house look presentable. But, well, for a hide-it-and-hope life just sort of gets in the way. So when someone’s popping round unexpectedly, the few hours they have just isn’t enough, hence the kitchen cupboard full of kids toys!


The Neat and Tidy Ninja


Backlit shadow of a person doing a flying kick
You’ll never even see them coming


Everybody’s preoccupied with their own activities; watching the TV, sitting on the computer, staring at their smartphone. This is when the Neat and Tidy Ninja strikes. Cleaning and tidying up like a whirlwind that follows in the wake of chaos and mess. And you’d better not leave a near-empty mug lying around because the Neat and Tidy Ninja will whip it away before you even realise you’re finished with it.


The Commander in Chief


Girl looking unimpressed with cleaning supplies
“You know I could be watching Netflix right now?”


Cleaning the house is like a military operation for the Commander in Chief. Everyone should know where they should be, what they should be doing and at what time they should be doing it. If you’re not doing something right then the Commander in Chief is certainly not afraid to let you know. Not afraid to get stuck in, but barks orders with the best of them. Top tip for dealing with the Commander in Chief – stick to that rota or there’ll be major trouble.
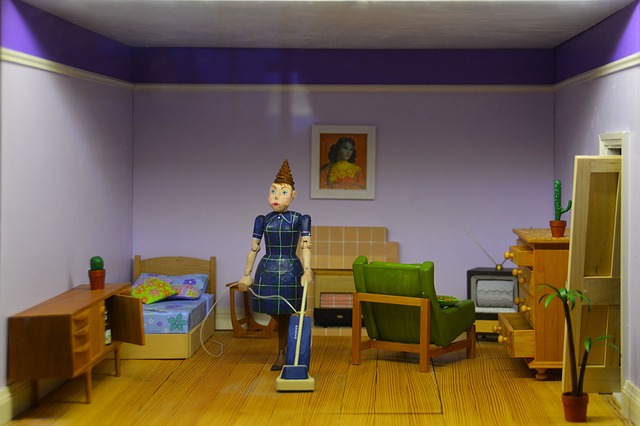


The Spick and Span


Magical-looking castle spires against a bright sky
“Of course the sparrows do a wonderful job of polishing the roof tiles for me. Bless their hearts.”


Floating around the house with custom cleaning kit, upcycled duster and handmade shabby-chic apron the Spick and Span cleans and polishes with a smile on their face and a song in their heart. Gliding over every surface with precision and glee, you’d be forgiven for mistaking their work for something magical and half-expecting to find them cleaning the kitchen with the help of some adorable woodland creatures.


What type of cleaner are you? Let us know in the comments!


Sometimes every type of cleaner needs a bit of a helping hand. If you’ve got a big party coming up or need a deep clean ready for the new season then get in touch to let us know what you need.


How To Remove Fake Blood and Face Paint Stains

Woman with face paint and red nails

Going all out with your costume at Halloween and becoming something magical, hilarious or truly terrifying is what it’s all about. But waking up on November the 1st to find your pillowcase stained with a green tinge is a real fright-fest, never mind the inevitable fake blood stains on your clothes … Oh the horror!

Don’t worry, follow these tips and avoid the nightmare.


Removing face paint stains from fabric


Water-based face paints usually wash out of fabric easily, however paints with a really strong colour that have a high pigment content might leave a stain. So for oil-based paints or when the stain doesn’t come out in a regular wash it’s recommended that you use a pre-treatment solution beforehand. This will help to break down the oils in the stain and make it easier for your normal detergent to do its job.


Removing fake blood stains


Fake blood is often made with oils and so stains can be really tricky to get out of fabric. Luckily you can effectively remove them using products that you can find around the house.

The best treatment is to gently rub talc into the fabric to absorb the oils from the stain and then liberally apply some white vinegar to the area and leave overnight. You can then throw the garment into the washer and set it onto a cold wash. At this stage you want to avoid applying heat as it can set the stain (so definitely no tumble-drying until you’re sure the stain is gone!).

Hopefully this has completely removed any stain, but if it’s really bad you can gently work some shaving foam into the fabric, rinsing in cold water and again adding to a cold wash.

With these tricks there’s no need to worry about being haunted by the remnants of your Halloween costume.


Happy Halloween!

Perfect Pumpkin Carving at Halloween

An orange pumpkin with a stalk

It’s that time of year again where we’re gearing up for the autumn/winter party season. And it all kicks off with Halloween, which means it’s pumpkin carving time!


So here are my tips for cleaning out your pumpkin to give you the perfect canvas for your Halloween masterpiece.


The best time to clean out your pumpkin is as close to the time you’re going to carve as possible. A warm pumpkin is much easier to cut into so start by bringing your pumpkin to room temperature by leaving it out in a warm room for a few hours, or overnight if you can. Next using some warm soapy water, clean the outside of the pumpkin and dry off thoroughly using some kitchen paper. This will reduce the bacteria that can get into the flesh when you start cutting and should mean that your masterpiece lasts a little longer.


Using a serrated knife (a kitchen one will do the trick), carefully cut a decent sized lid out the top of your pumpkin. Once you’ve removed the lid you can get at all those lovely insides. Pull out as much as you can with your hands and put the fibres and seeds to one side in a bowl (check the recipe below for a tasty reason to keep these!). With an ice cream scoop or sturdy metal spoon, firmly scrape the remaining seeds and fibres away from the flesh. Scrape away lightly at the flesh and get the inside surface as clean and smooth as possible. Don’t forget to do the same for your lid and make sure there are no stray fibres hanging around there either. It’s all about giving your pumpkin the best chances at survival.


Now your pumpkin is ready for carving. If you’ve not decided on a design yet then The Pumpkin Lady has some great printable templates that are free to download. Usually a combination of kitchen utensils is all you need for carving but you can get some great carving kits from local supermarkets at this time of year. Which is a great idea if you’re getting the kids involved!


Once you’ve carved your design keep the pumpkin as cold as possible and spray with a solution of bleach diluted with water. This will kill the bacteria that gets into the flesh through the cuts you’ve made and should make your perfect pumpkin last a little longer.


Toasted Pumpkin Seeds Recipe


Remember those seeds you put to one side earlier? You can make a tasty snack, soup or salad topper with them. Nothing goes to waste in this house!


  1. Preheat your oven to 180
  2. Wash the pumpkin gunk off the seeds
  3. Dry the seeds thoroughly
  4. Toss in your choice of seasoning (my favourite is vanilla sugar which makes them perfect for adding to cereal in the morning)
  5. Spread out on a baking sheet
  6. Bake for 10 minutes, remove from the oven and mix them around a little, then bake for a further 6-8 minutes (keep a close eye on them if you’re doing a sweet version as they can catch easily)
  7. Remove from the oven to cool
  8. Store in tupperware or a jar, or start snacking – depending on your level of willpower right now

Good luck with your pumpkin carving and have a great Halloween!
Next time – how to get those stubborn fake blood and face-paint stains out.

Why make your bed every morning ?

york cleaner york bedroom

Why make your bed every morning ?


Caroline has a real thing about the way rooms should look after her or her team have left your house. They may not be asked to change the bedding but they will make sure you have a tidy, made bed to come home to, to climb back into after a long day.


unmade bed


  1. The bed  makes the room look finished; if you feel like doing it yourself it gives you a productive start to the day, invigorating, a bit of exercise – all before your cup of coffee in the morning. Before jumping in the shower. Before sleeping.
  2. It given the impression of the rest of the room being tidy or with the intention of tidiness. If you have a made bed you are far less likely psychologically to throw your old clothes on the floor or on the bed and mess it…they may just end up in the laundry basket.
  3. It’ll set a good impression for the younger members of the family. And therefore one less job as you pass their door after they’ve gone to school.
  4. If a visitor comes to your house and has to pass your bedroom you won’t panic because a tidy room saves embarrassment and a sudden need to run upstairs and close your door before you let them up to repair the bathroom sink or your friend using your toilet.
  5. Another good reason is that when you come home after a long day its so nice to glance in the bedroom or fall into bed into a bed that looks lovely and crisp and tidy and like its not been left 10 minuted before.


york cleaner york bedroom


Please comment below so we know what you think ? What are your ideas – should you make the bed or not ?

Share this to your own blog or  link to our article freely. 


First Yell Review

yell.com

We have our first Yell.com review

read it here..
01 Jun 2016
Amazing job every time!
We would and have recommended Cleaning At Your Place. They are friendly and most importantly do an amazing job and we are super fussy!! They really go the extra mile which we really appreciate!

from a valued customer of ours. It’s the first review but then we’ve only been on yell a week.

We pride ourselves on offering gold standard, individual service to all our customers, making sure they get the details they wanted taken care of week after week.